Merchandising Studio
Available on premium plans, the Merchandising Studio is an all-in-one no-code interface tailored for retail ecommerce, providing drag-and-drop visual merchandising capabilities for both search and category pages combined with powerful analytics.
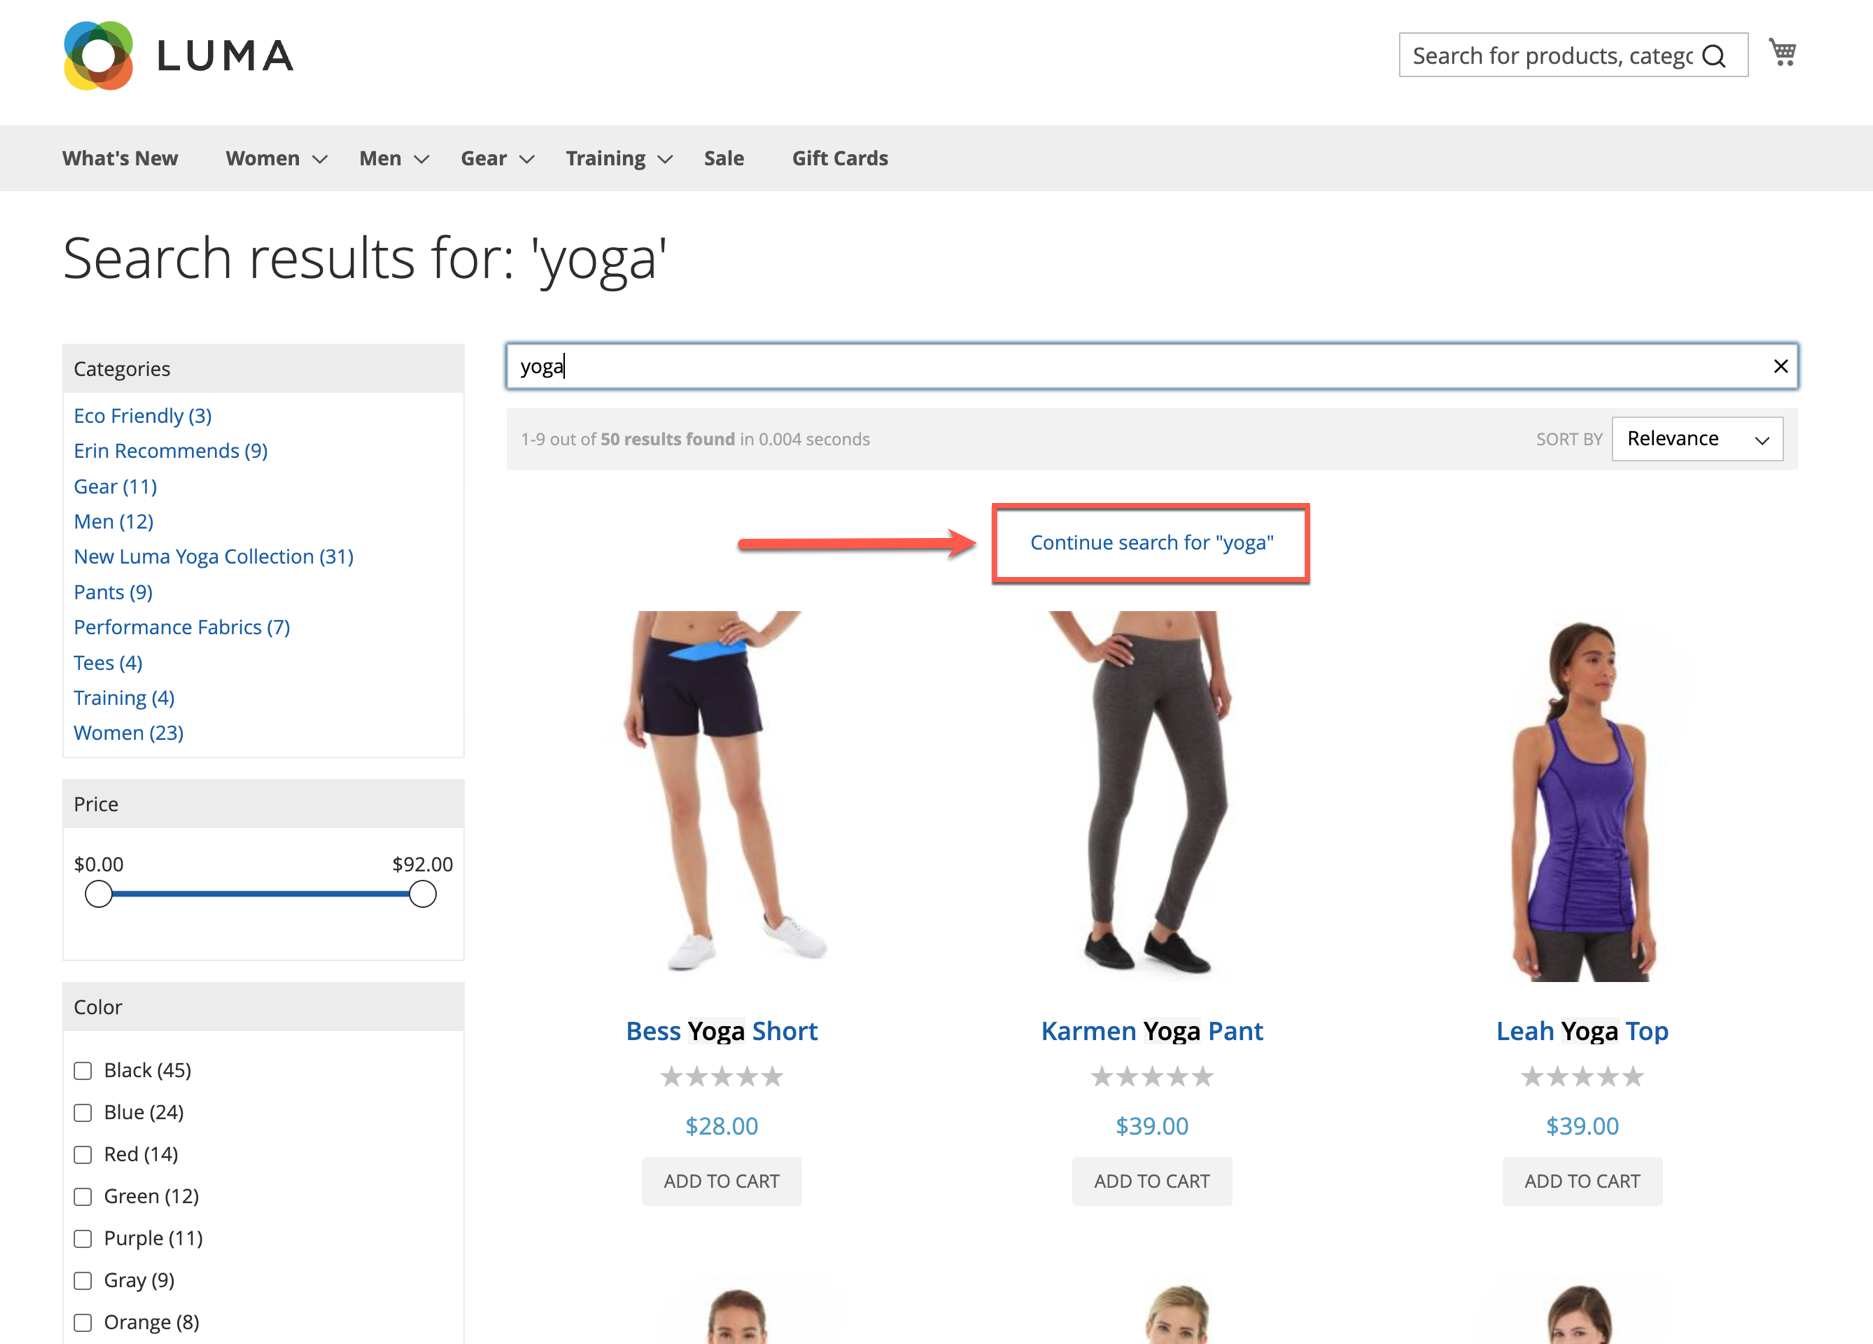
A new way to merchandise with Magento
It is recommended wherever possible to use the Merchandising Studio instead of the merchandising capabilities that have been previously provided within our Magento extension. No new features will be added to the legacy merchandising capabilities and they may be removed from the extension in the future.
Meanwhile, the Merchandising Studio offers many benefits over the legacy extension capabilities including:
- Centralized rule management (eliminating the risk of rule overwriting by the Magento integration)
- The ability to do more than just pinning items such as:
- Boost/bury attributes
- Dynamic Re-Ranking
- Results filtering
- Sorting strategies
- The ability to apply multiple merchandising strategies at a time
Further, the legacy Magento merchandising feature creates Manual Rules in Algolia. The new integration with Merchandising Studio supports the creation of Visual Rules which are far easier to work with for business team users.
To use the Merchandising Studio with Magento, you need to upgrade the Algolia extension to version 3.11 or later. Along with Merchandising Studio support, you can now also create Visual Editor rules for categories in the standard Algolia dashboard.
Enable Merchandising Studio
To enable Merchandising Studio, go to Stores > Configuration > Algolia Search > Products and set Enable visual merchandising support to Yes:

After enabling this setting, specify a category page identifier:

Enter the name of the attribute of your indexed product records that serves as category page identifier.
The default name for this attribute is categoryPageId.
After making your changes:
- Save your settings within the Magento admin interface.
- Clear your local Magento configuration cache by running:
bin/magento cache:flush config - Re-run the full Algolia product indexer:
bin/magento algolia:reindex:products(orbin/magento indexer:reindex algolia_productsif you’re on version 3.15.x or lower).
This action creates a new attribute in your records with data pulled from your Magento category tree. The attribute is also added to your attributesForFaceting list.
A full reindex of your product catalog to Algolia is a critical step. If you enable support for visual merchandising in Magento but don’t re-run the index, your category pages won’t correctly load products from the Algolia index.
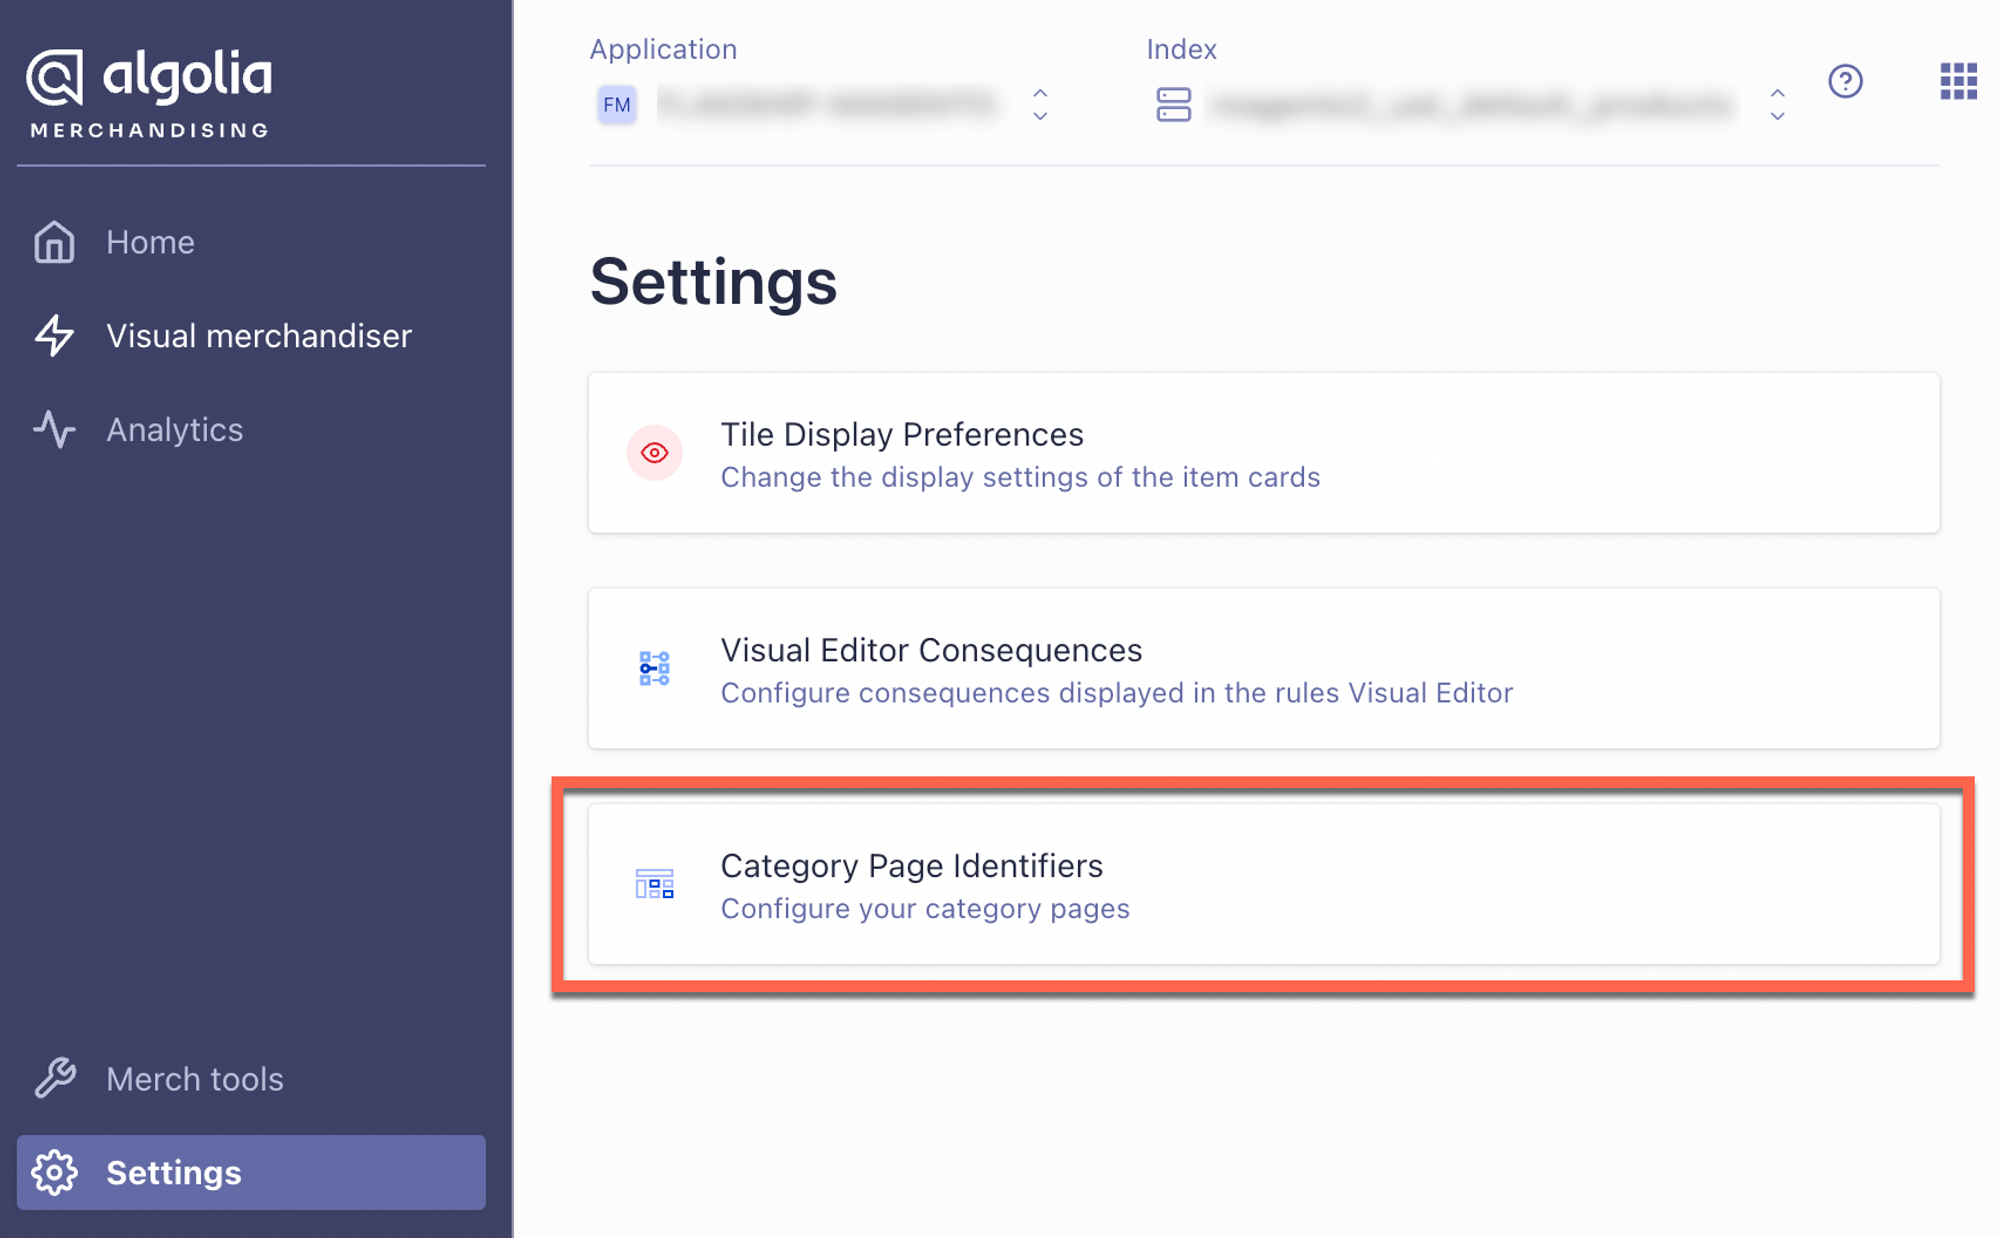
Category page identifiers
Once your products have been indexed into Algolia with the new category page identifier, configure Merchandising Studio to use this information:
-
In the Algolia dashboard, select Merchandising Studio in the top right.

-
Go to Settings > Category Page Identifiers:
-
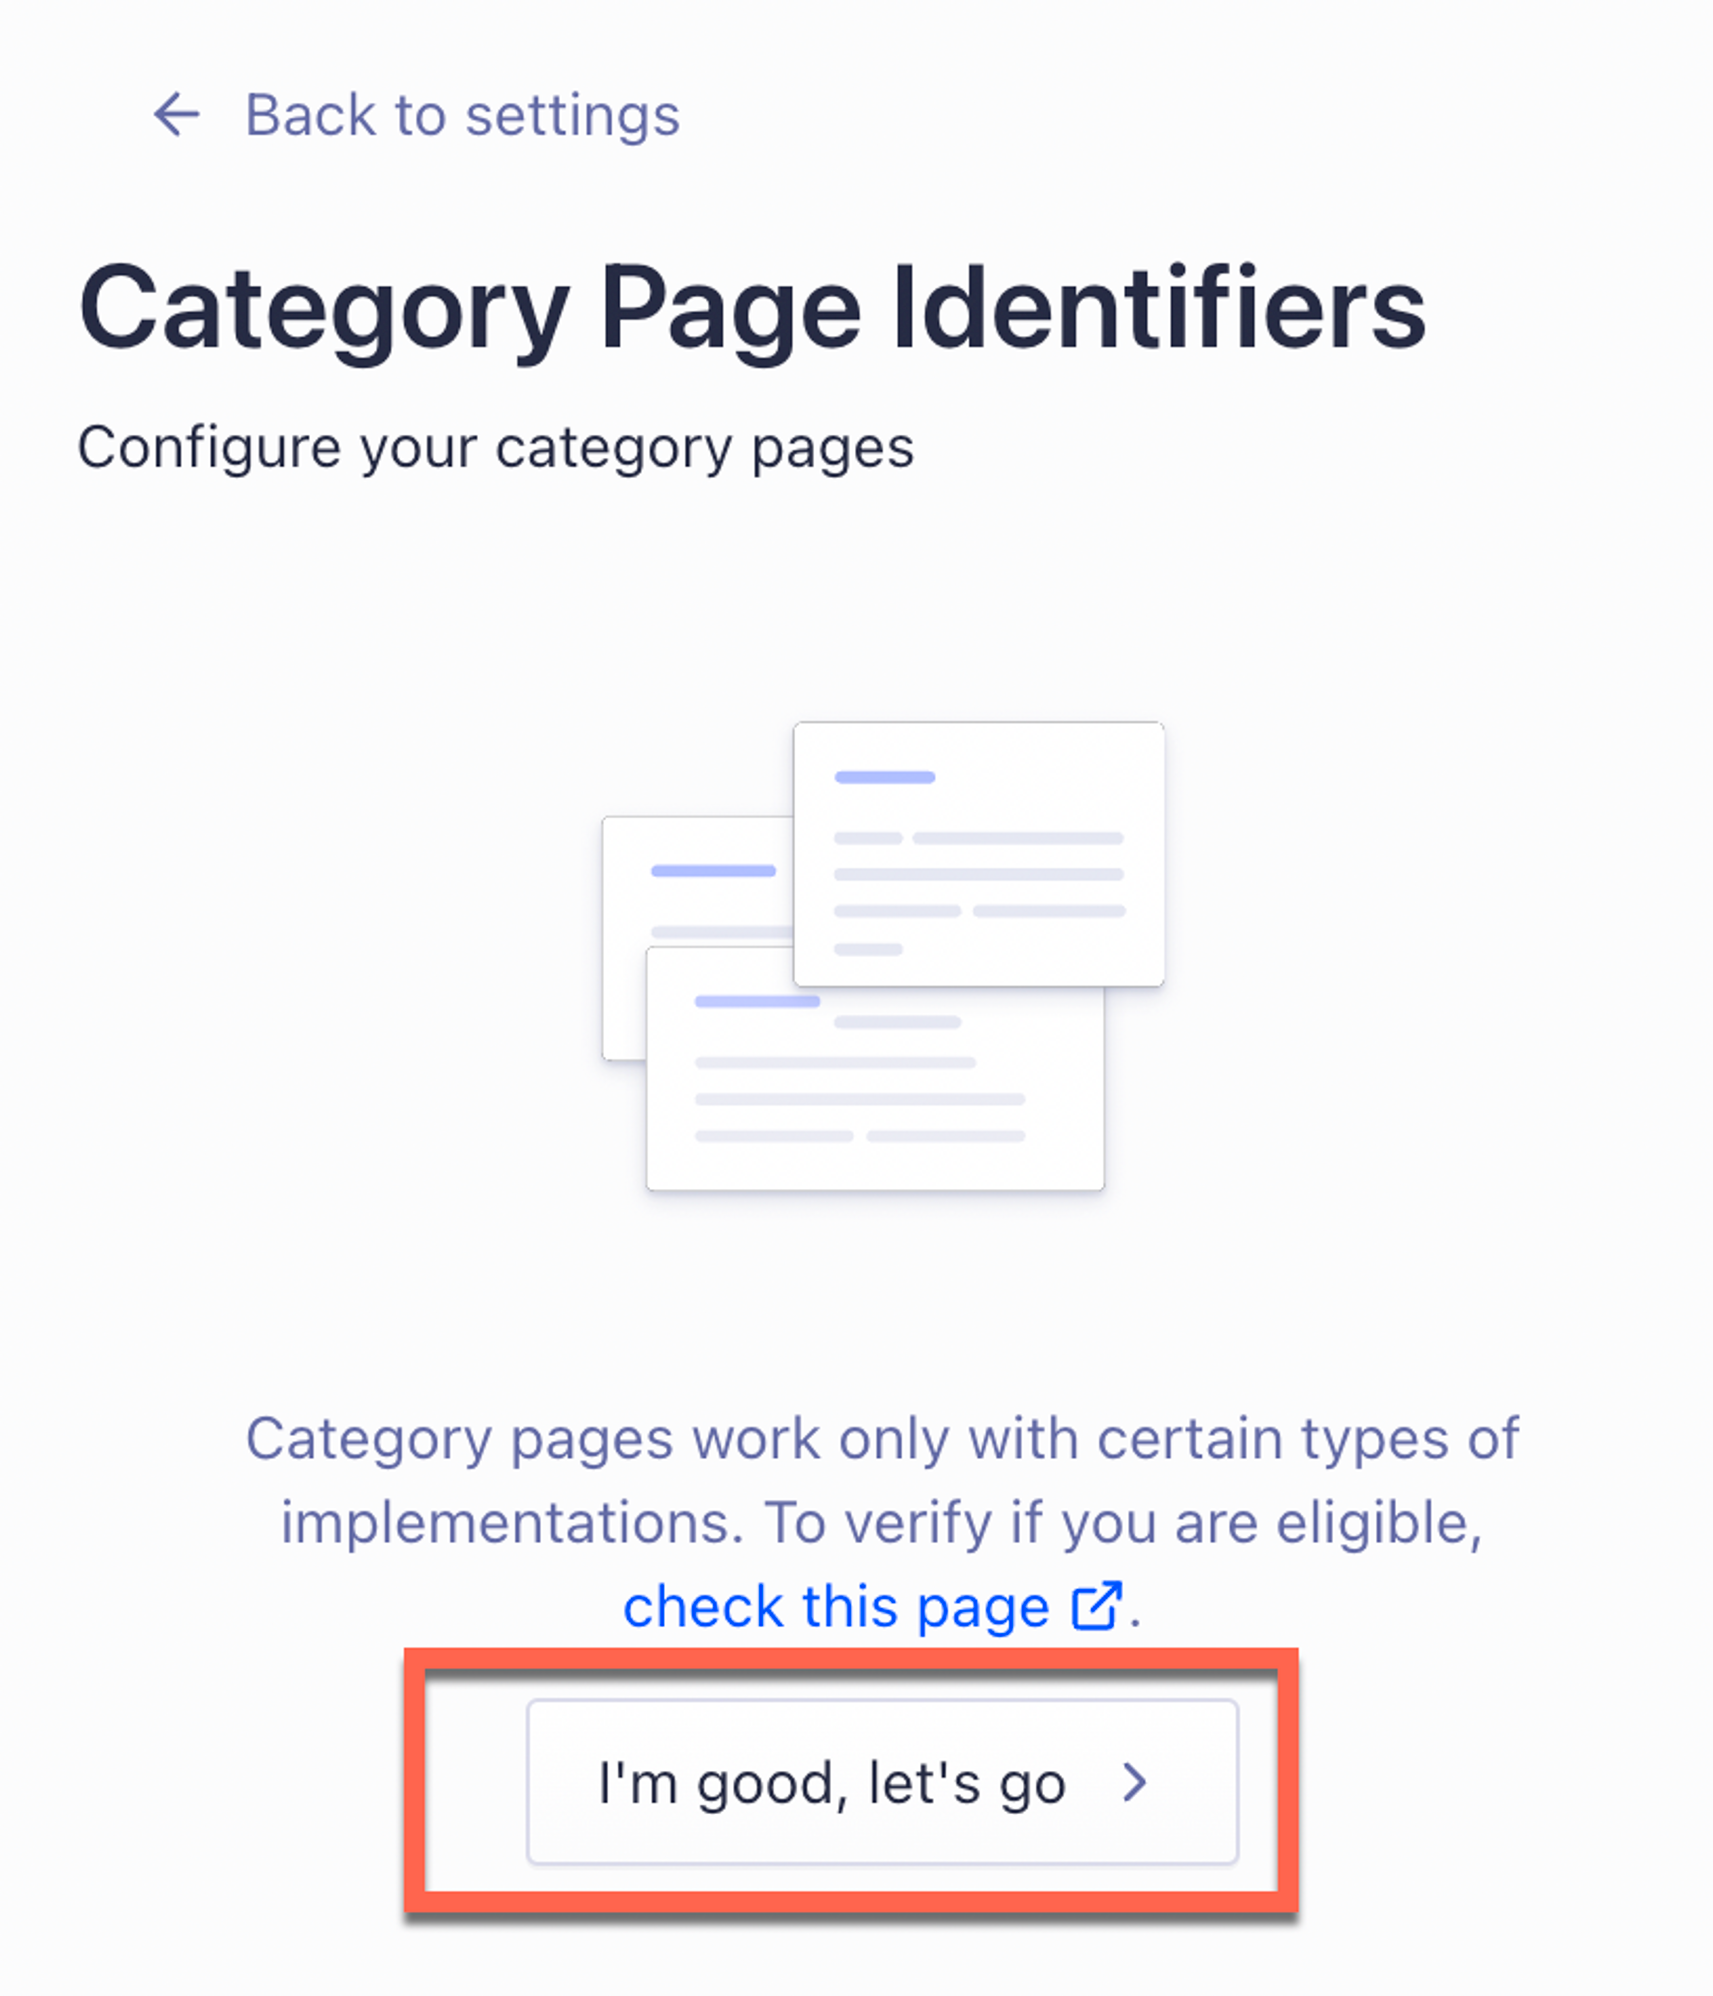
The Magento integration automatically formats your category data for you, so you can ignore the warning “Category pages only work with certain types of implementations”.
Click I’m good. Let’s go.
-
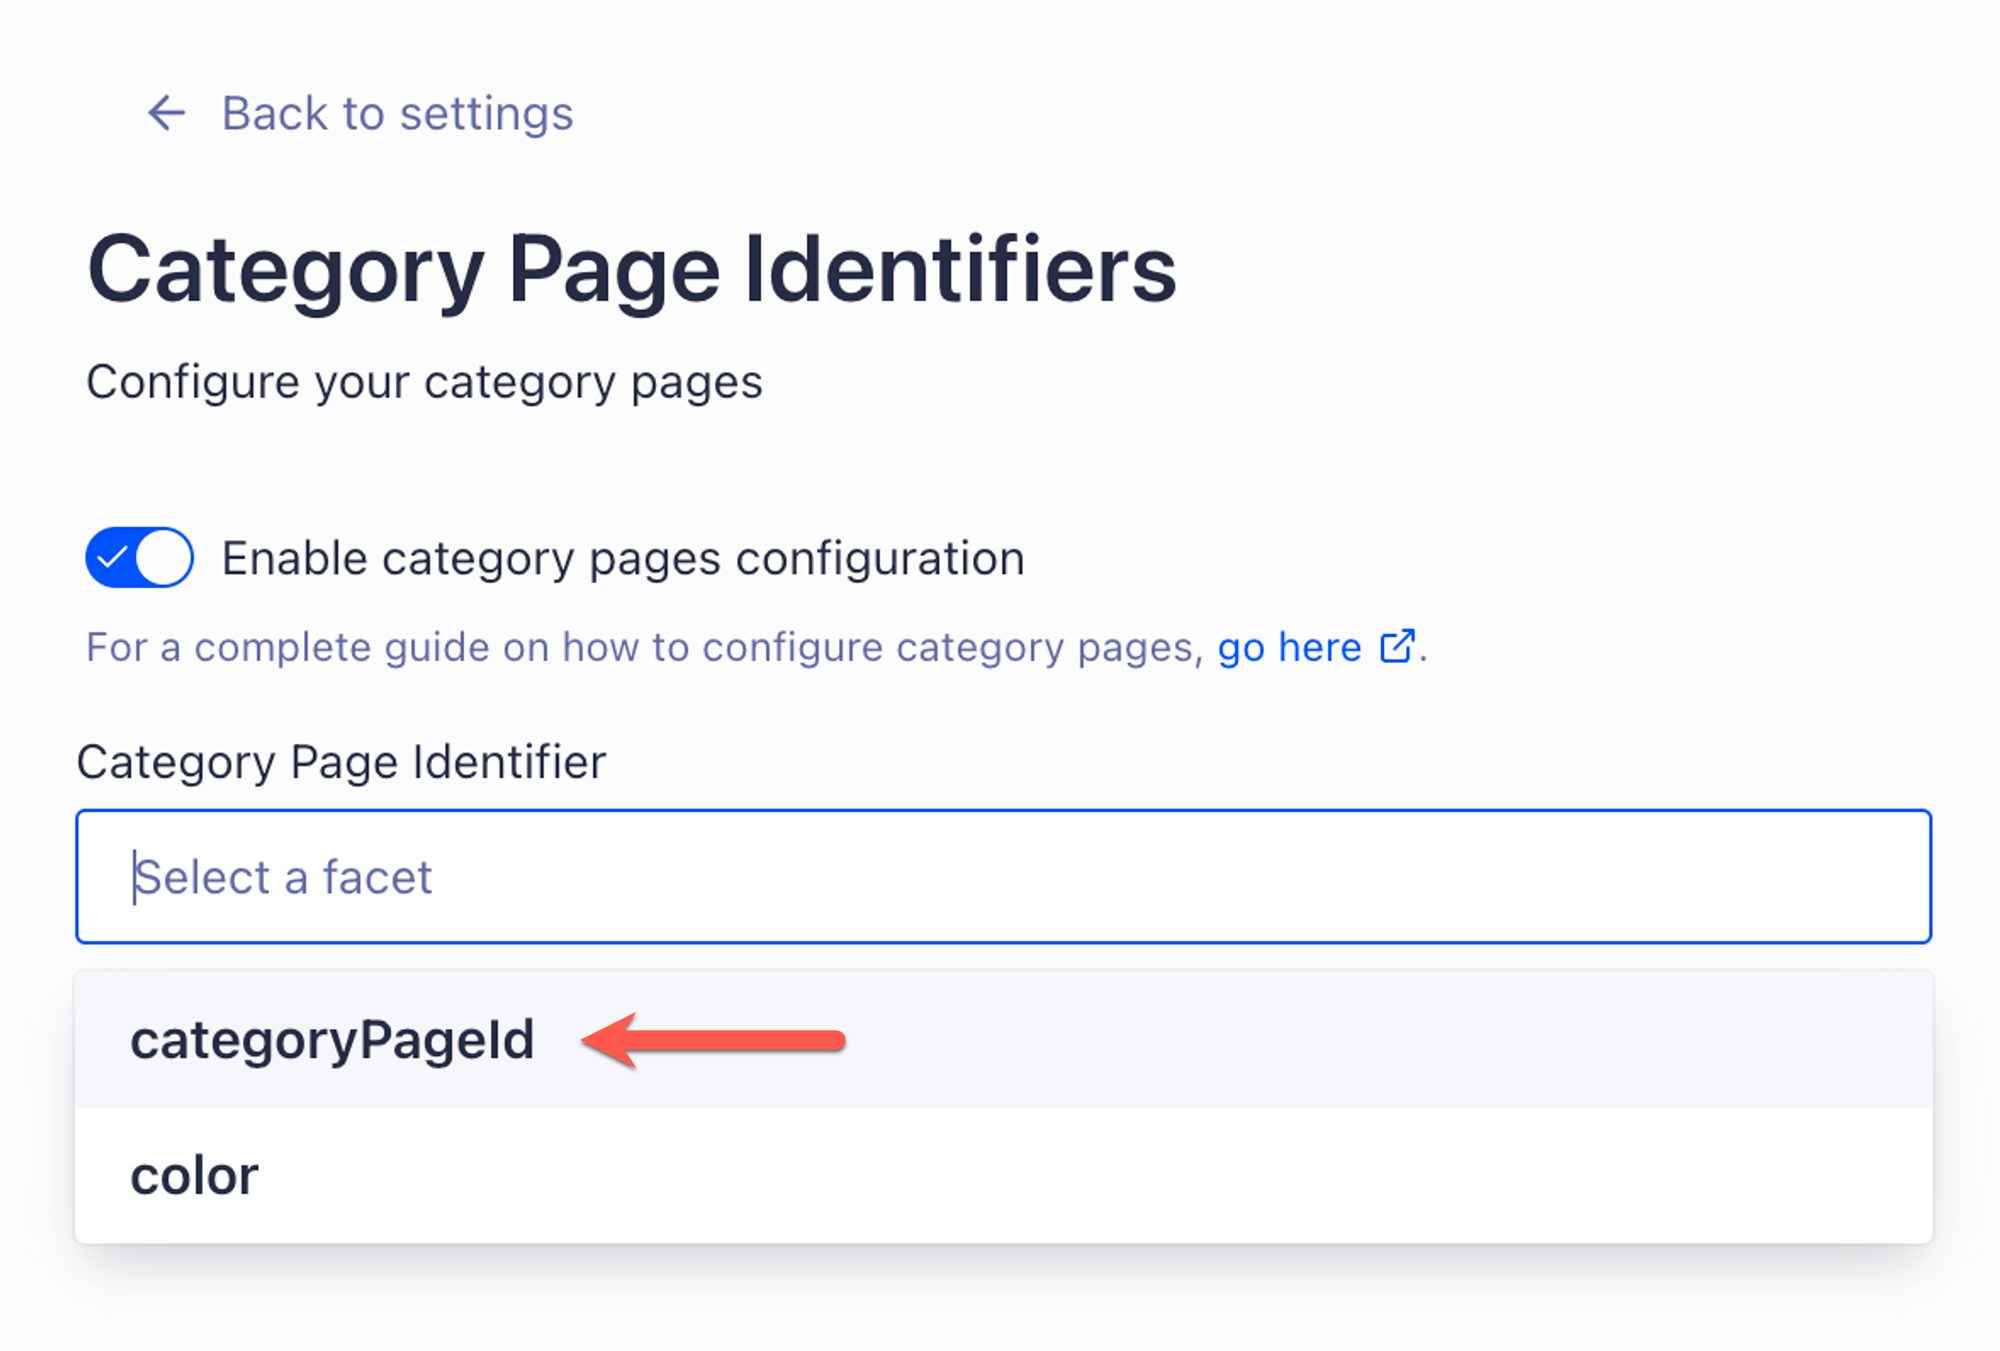
Select the same category identifier you configured in the Magento admin.
The following example uses categoryPageId, which is the default attribute name:
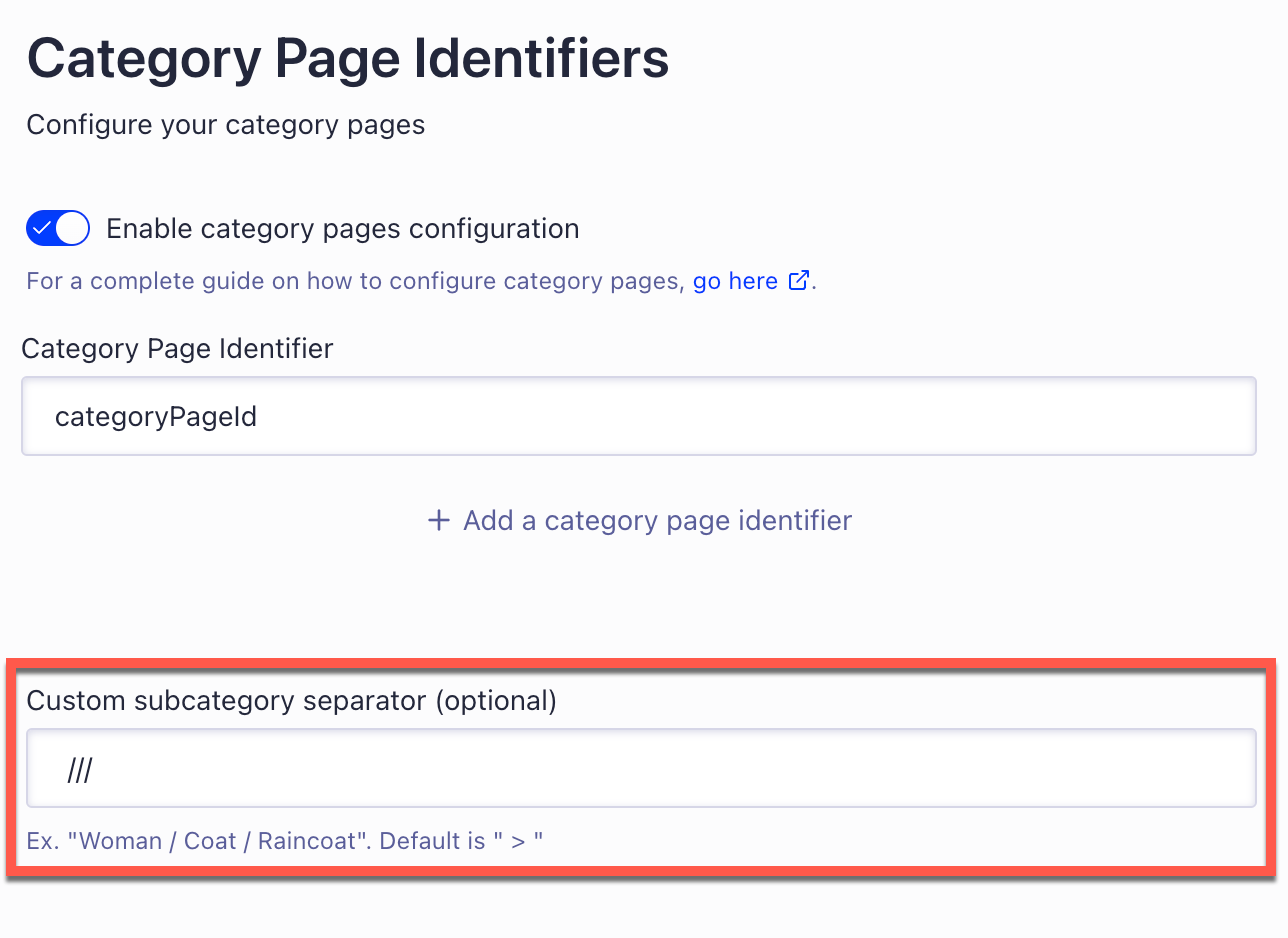
Subcategory separator
Even though it’s labeled as optional for the Magento extension, you must specify the Custom subcategory separator
The Algolia Magento extension uses /// as default category separator . You must configure the Merchandising Studio to match.
This setting is whitespace-sensitive. Make sure to include leading and trailing spaces:
If you want to use a different subcategory separator, update both your Magento and Merchandising Studio configurations.
-
In Magento, go to Stores > Configuration > Algolia Search > Categories > Category separator and change the category separator.
- Reindex your products in Algolia.
- Update the Merchandising Studio configuration as described previously.
If you change your category separator in Magento, always run a full product re-index to Algolia or else your category pages won’t render correctly on your store front.
Supported features
Enabling the visual merchandising setting in Magento lets you merchandise category pages using rules.
The Magento integration supports the following features in the Algolia Merchandising Studio:
The following features require customizing your frontend libraries:
For more information, see Custom frontend events.
Dynamic re-ranking
To apply dynamic re-ranking to Magento categories:
- In the Algolia dashboard, go to Search > Enhance > Re-Ranking > Settings.
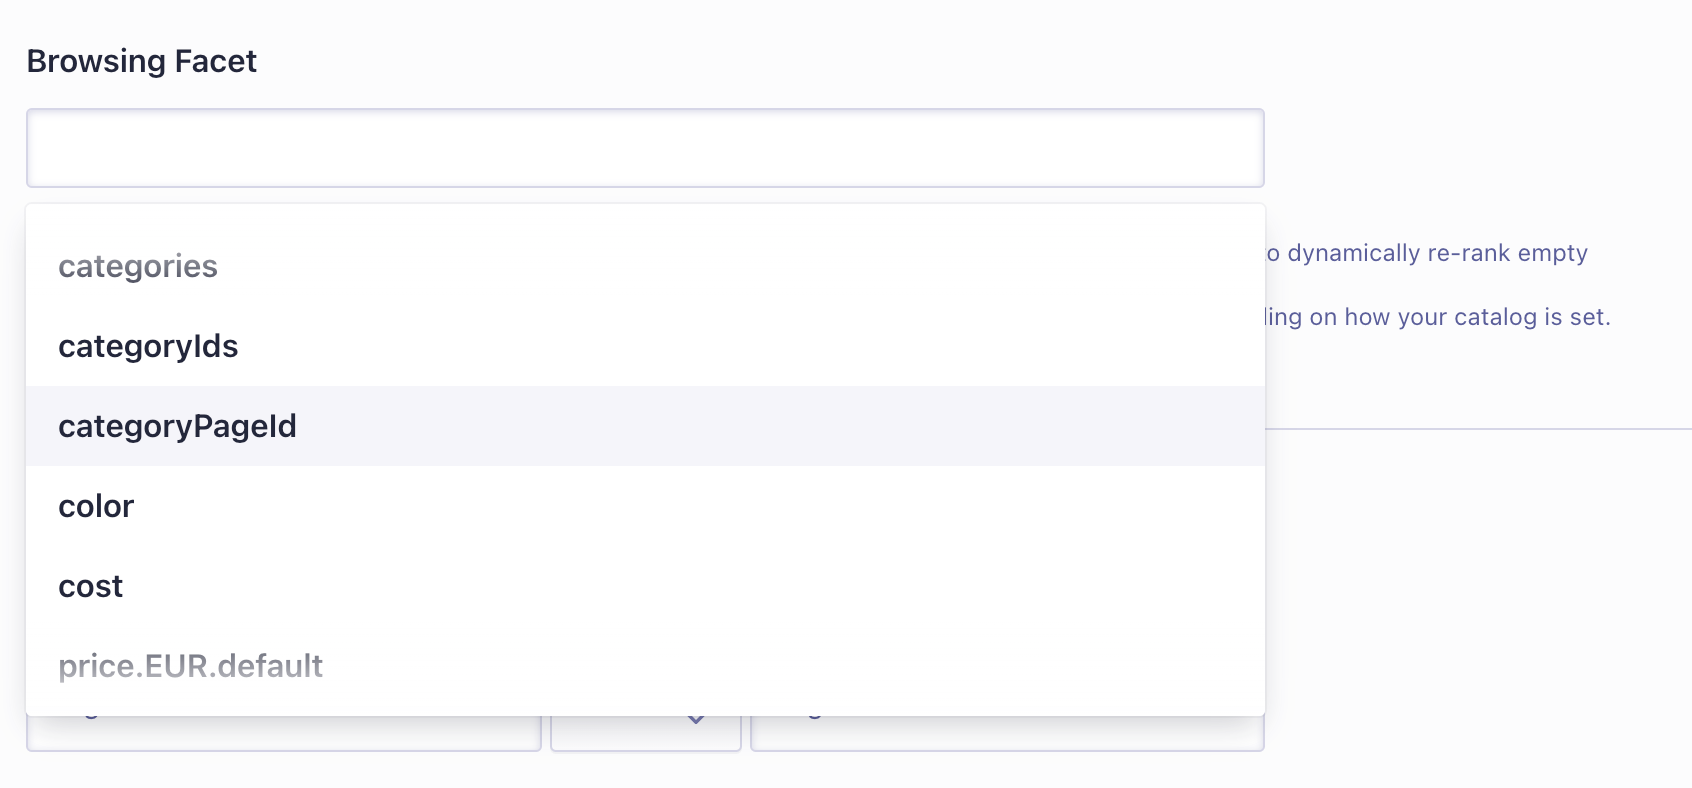
- In the Browse Facet box, enter your category page attribute you configured previously. set “Browsing Facet” to the category page id attribute specified earlier.
For example, to use dynamic re-ranking on the attribute categoryPageId:
Dynamic facets
From Magento extension version 3.16, you can dynamically adjust the facets displayed on your Magento store’s search results and category pages using Algolia Rules.
Enable this feature from Stores > Configuration > Algolia Search > InstantSearch Results Page > Faceting > Enable dynamic facets.
Dynamic facet support in Magento relies on the facet display feature, controlled by the renderingContent parameter.
Facet display itself is a Merchandising Studio feature.
How dynamic faceting works in Magento
The Algolia Magento extension sets a default facet display for all product listing pages based on the attributes you configure under Stores > Configuration > Algolia Search > InstantSearch Results Page > Faceting > Facets.
You can use an Algolia rule to override the default facet display when the user’s query or applied filters match the rule’s conditions.
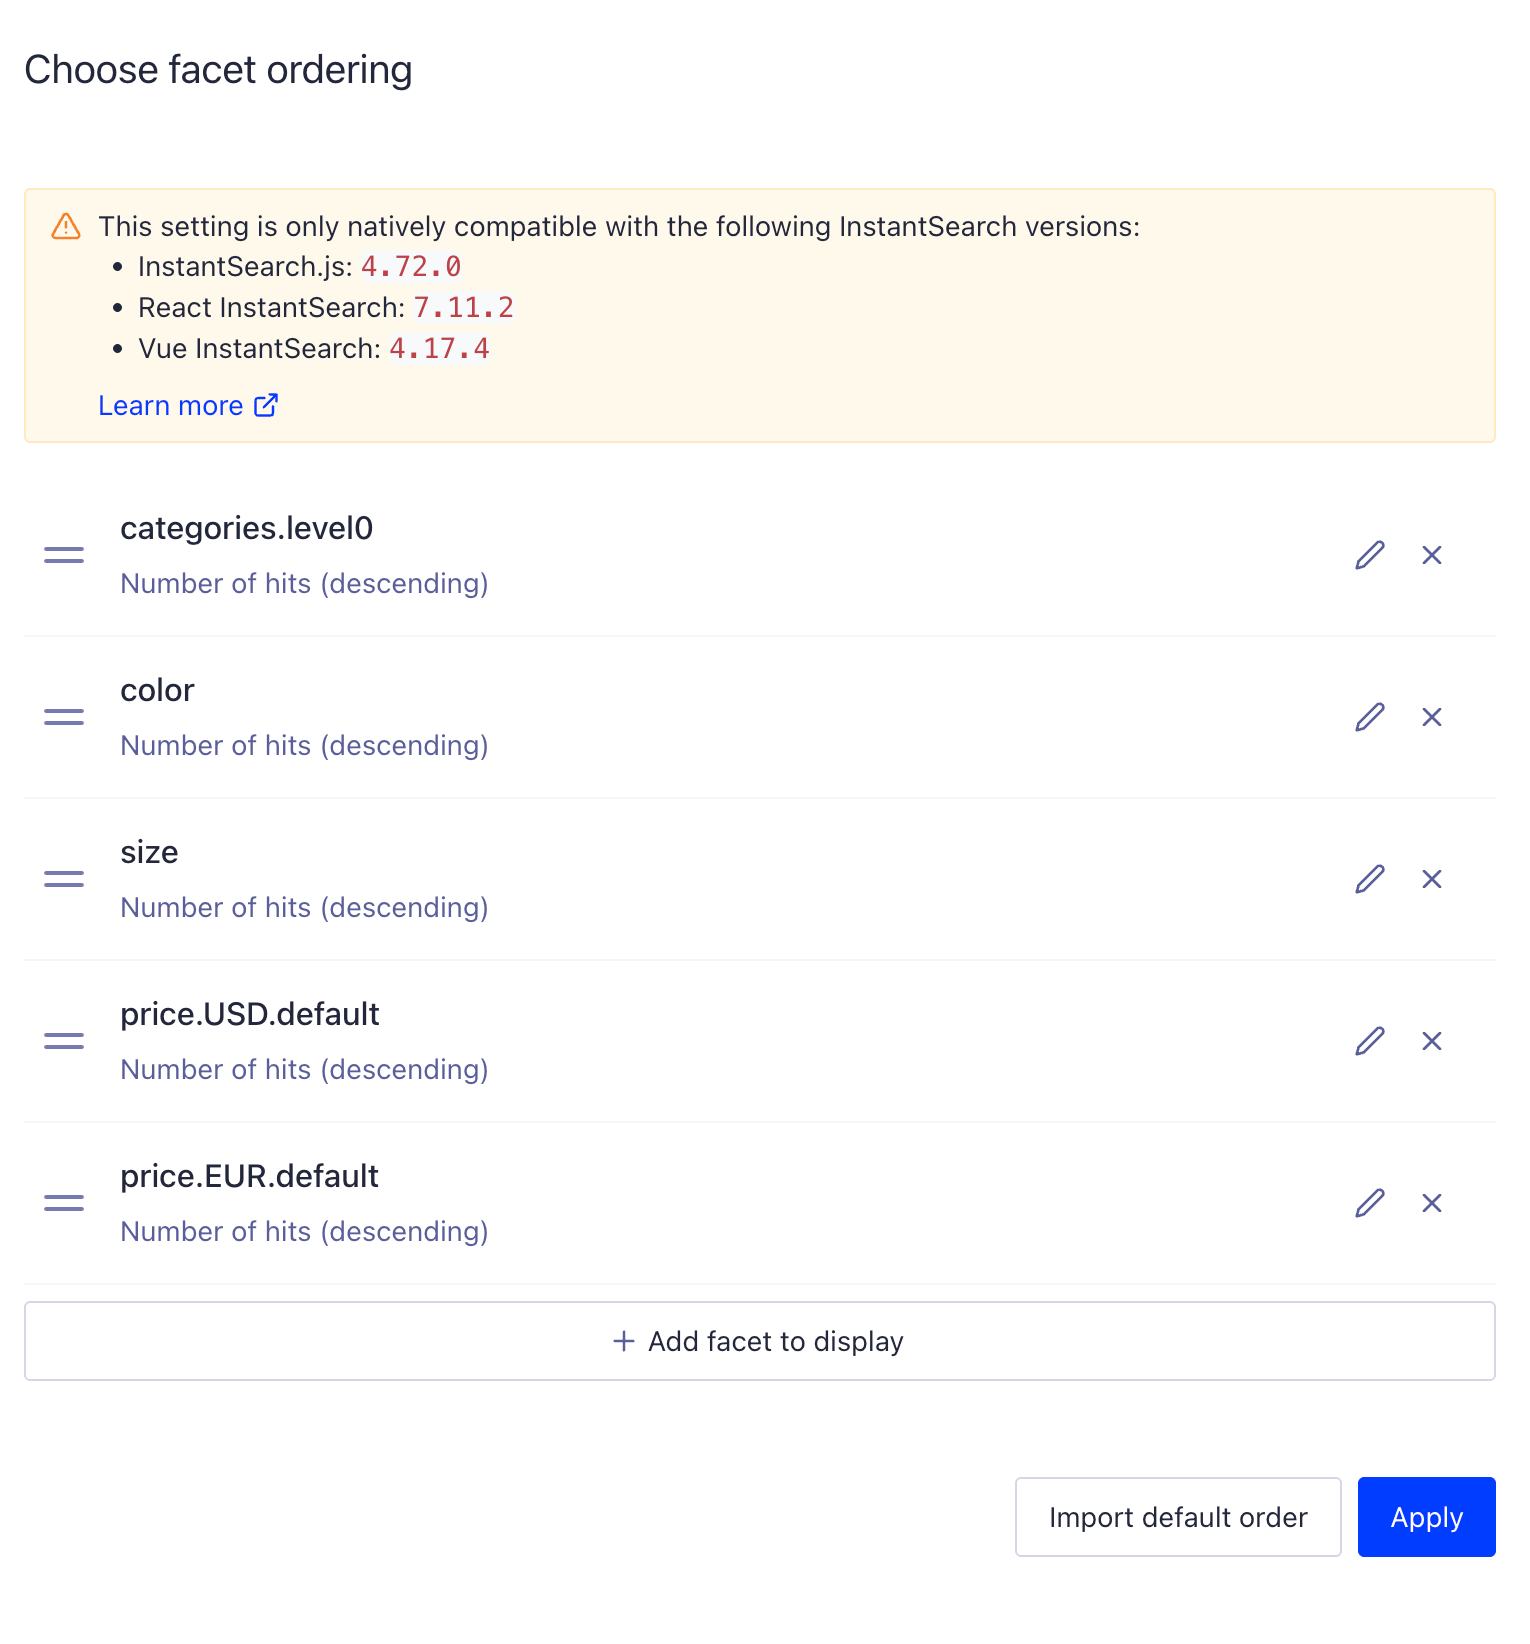
In the following example, five facets have been defined for this Magento store:
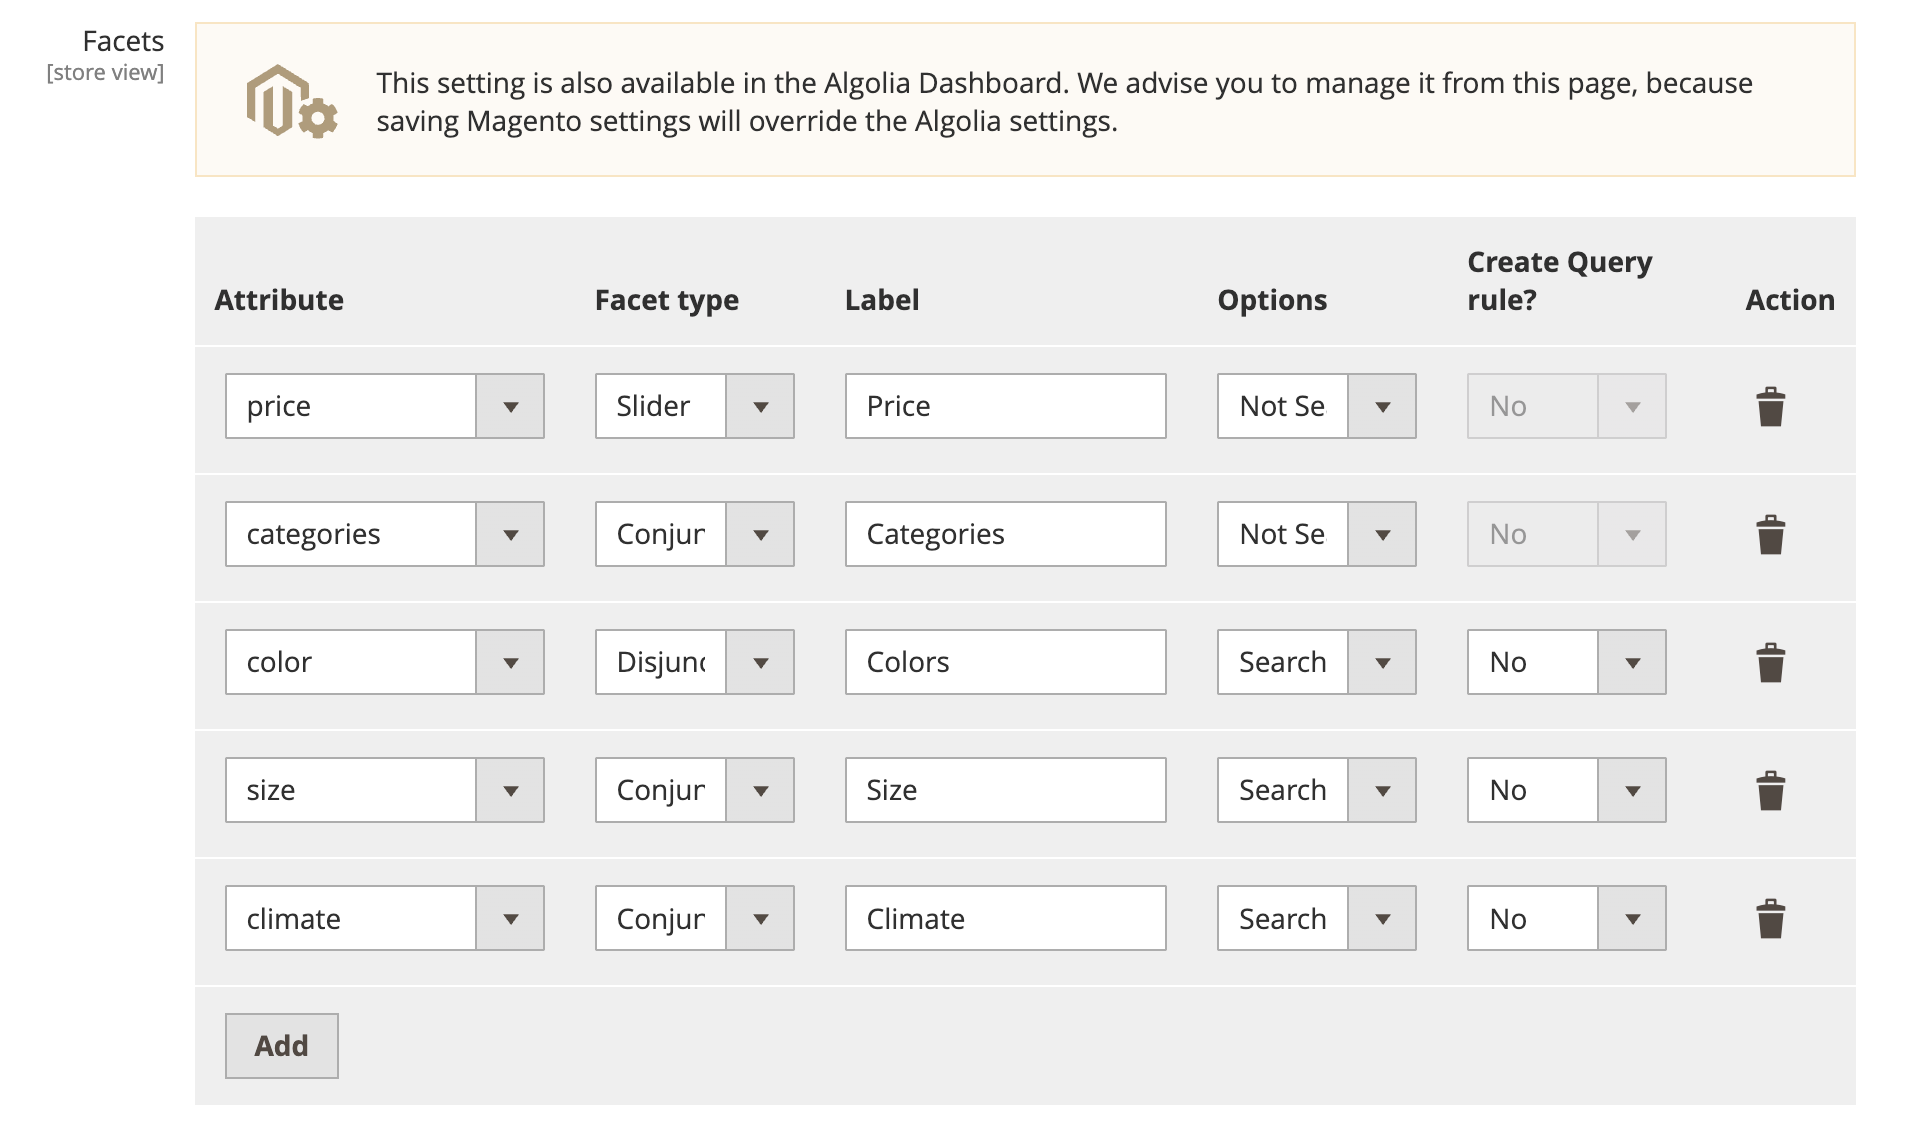
After saving these facet display settings, you can find them under Search > Configure > Index > Configuration > Filtering and Faceting > Facet Display:
This setting controls what facets can be displayed on a product listing page and the order in which they appear.
Because Magento updates the facet display value, don’t attempt to change this setting in Algolia. To change the way the setting is constructed by Magento, see Overriding index settings.
Applying dynamic facets with rules
After verifying that Magento can update the facet display setting for your store’s product index, you can apply dynamic facets.
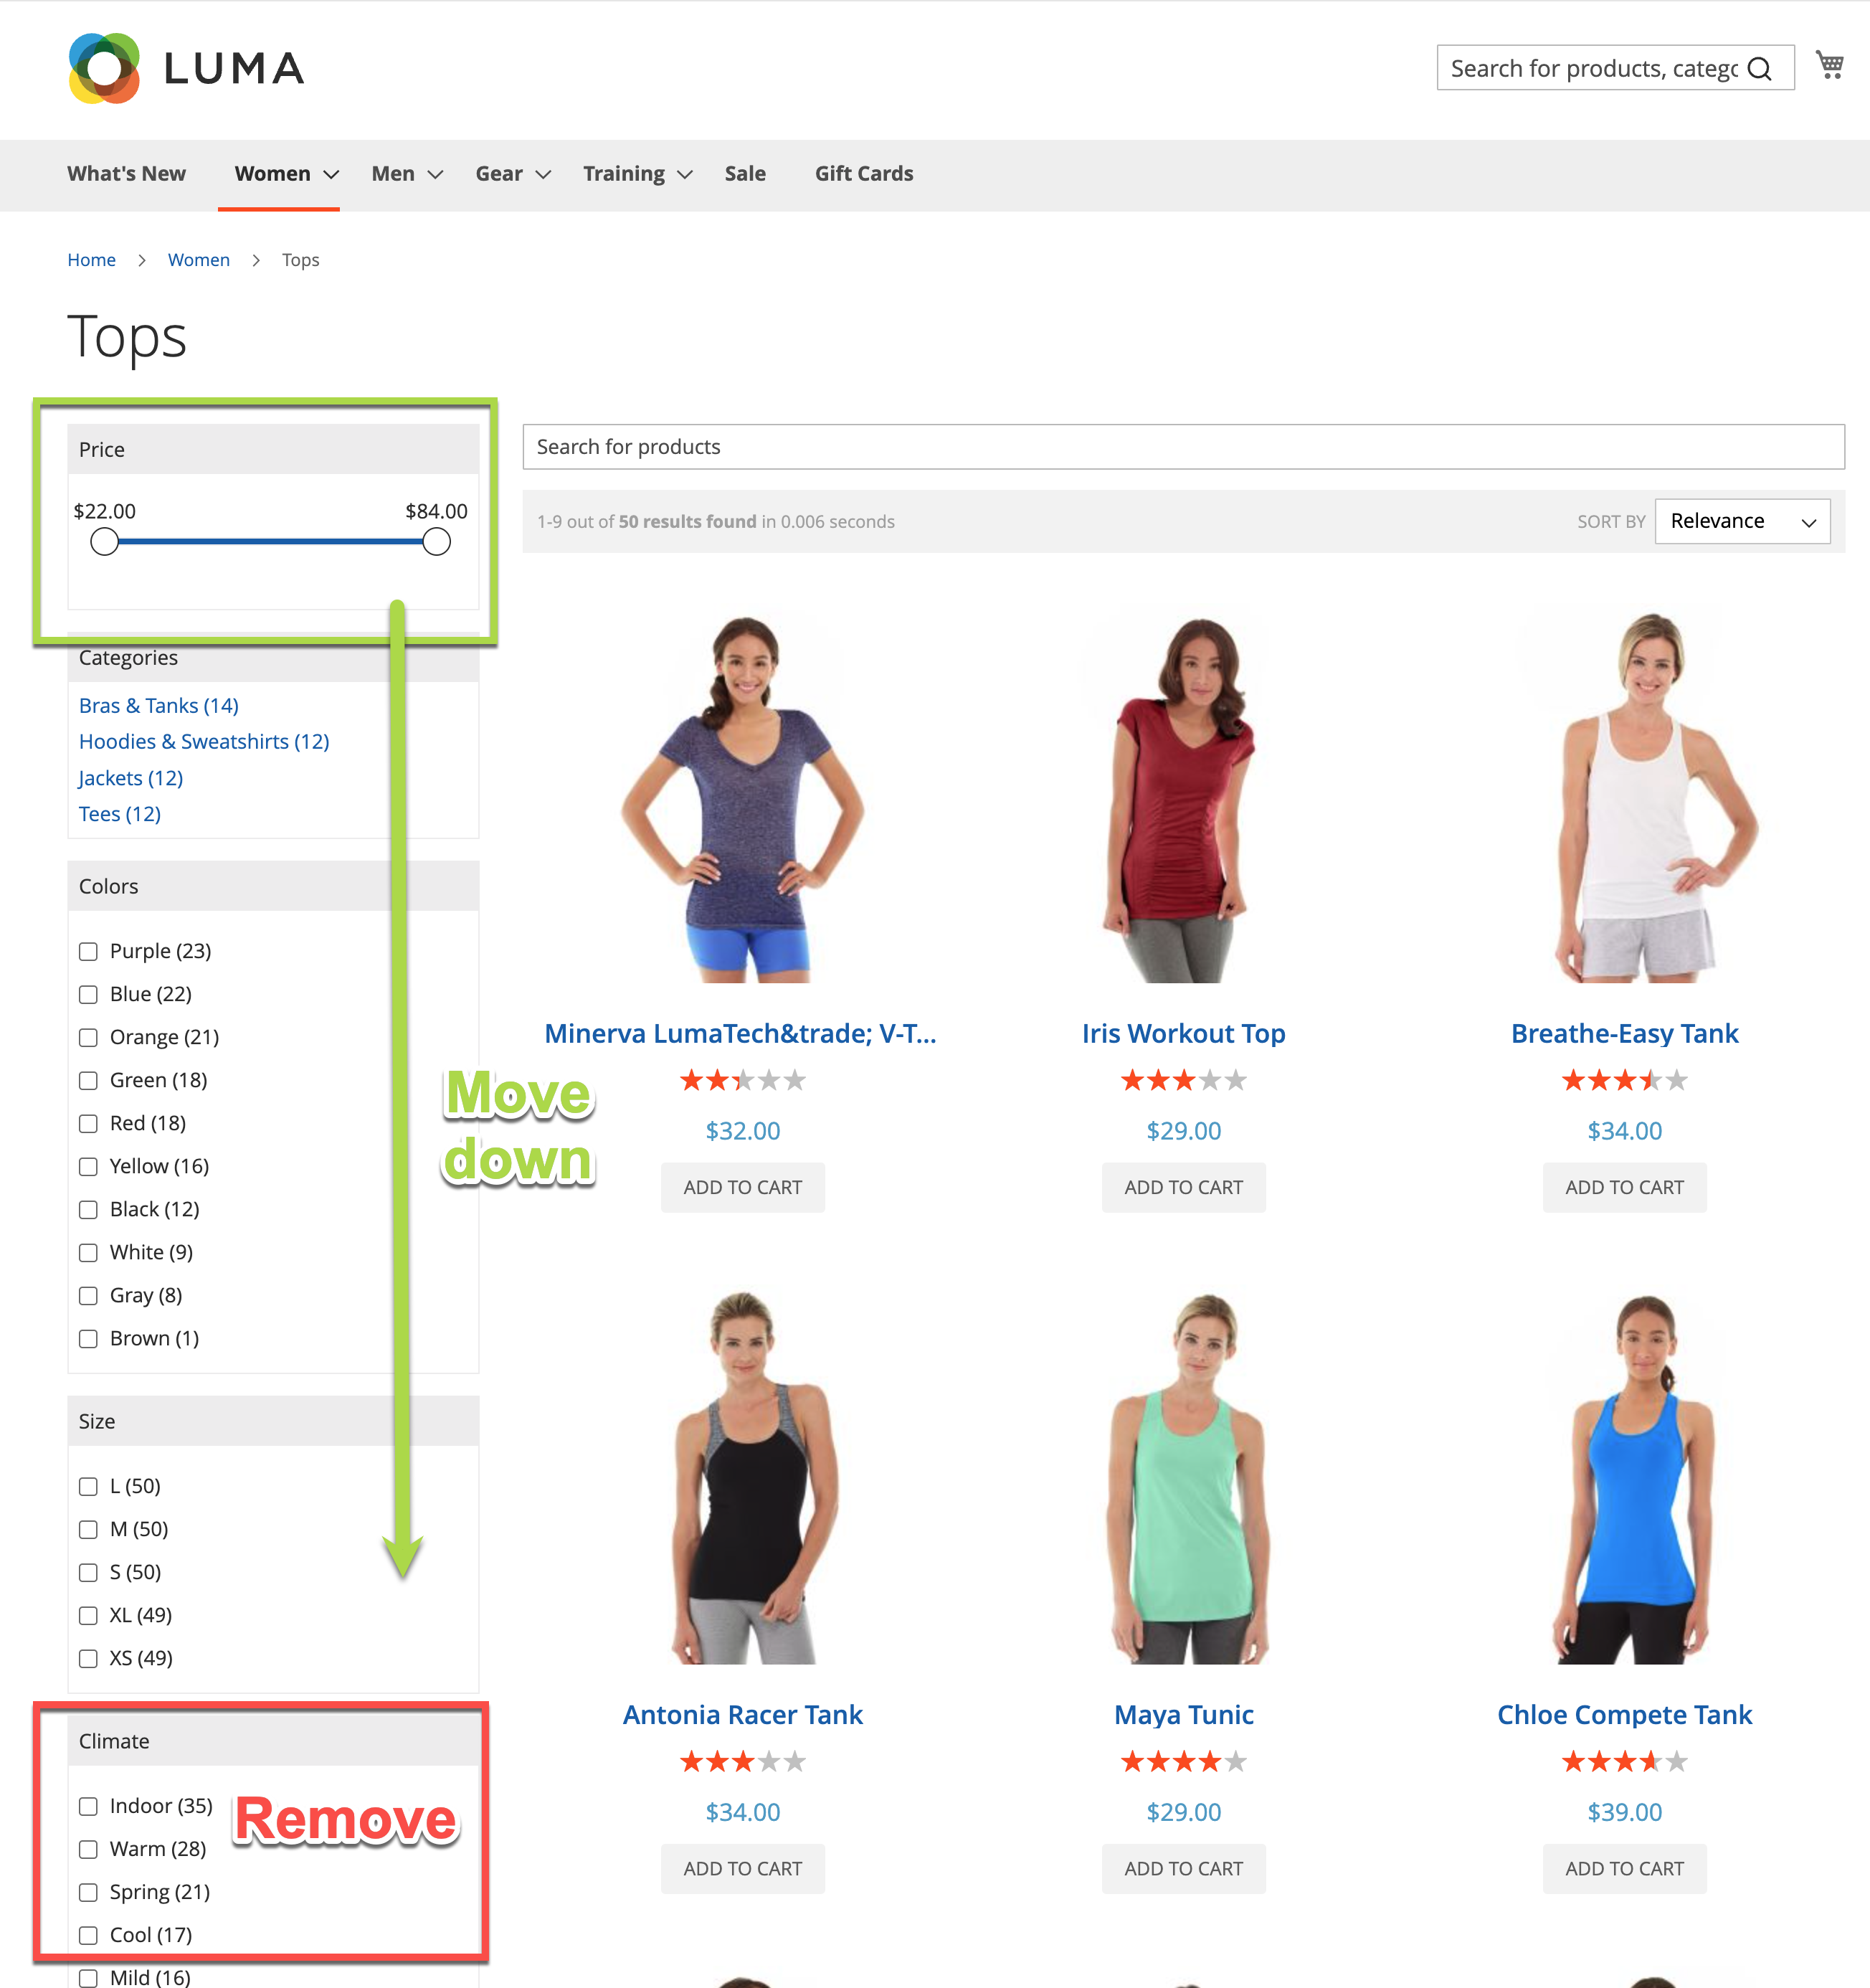
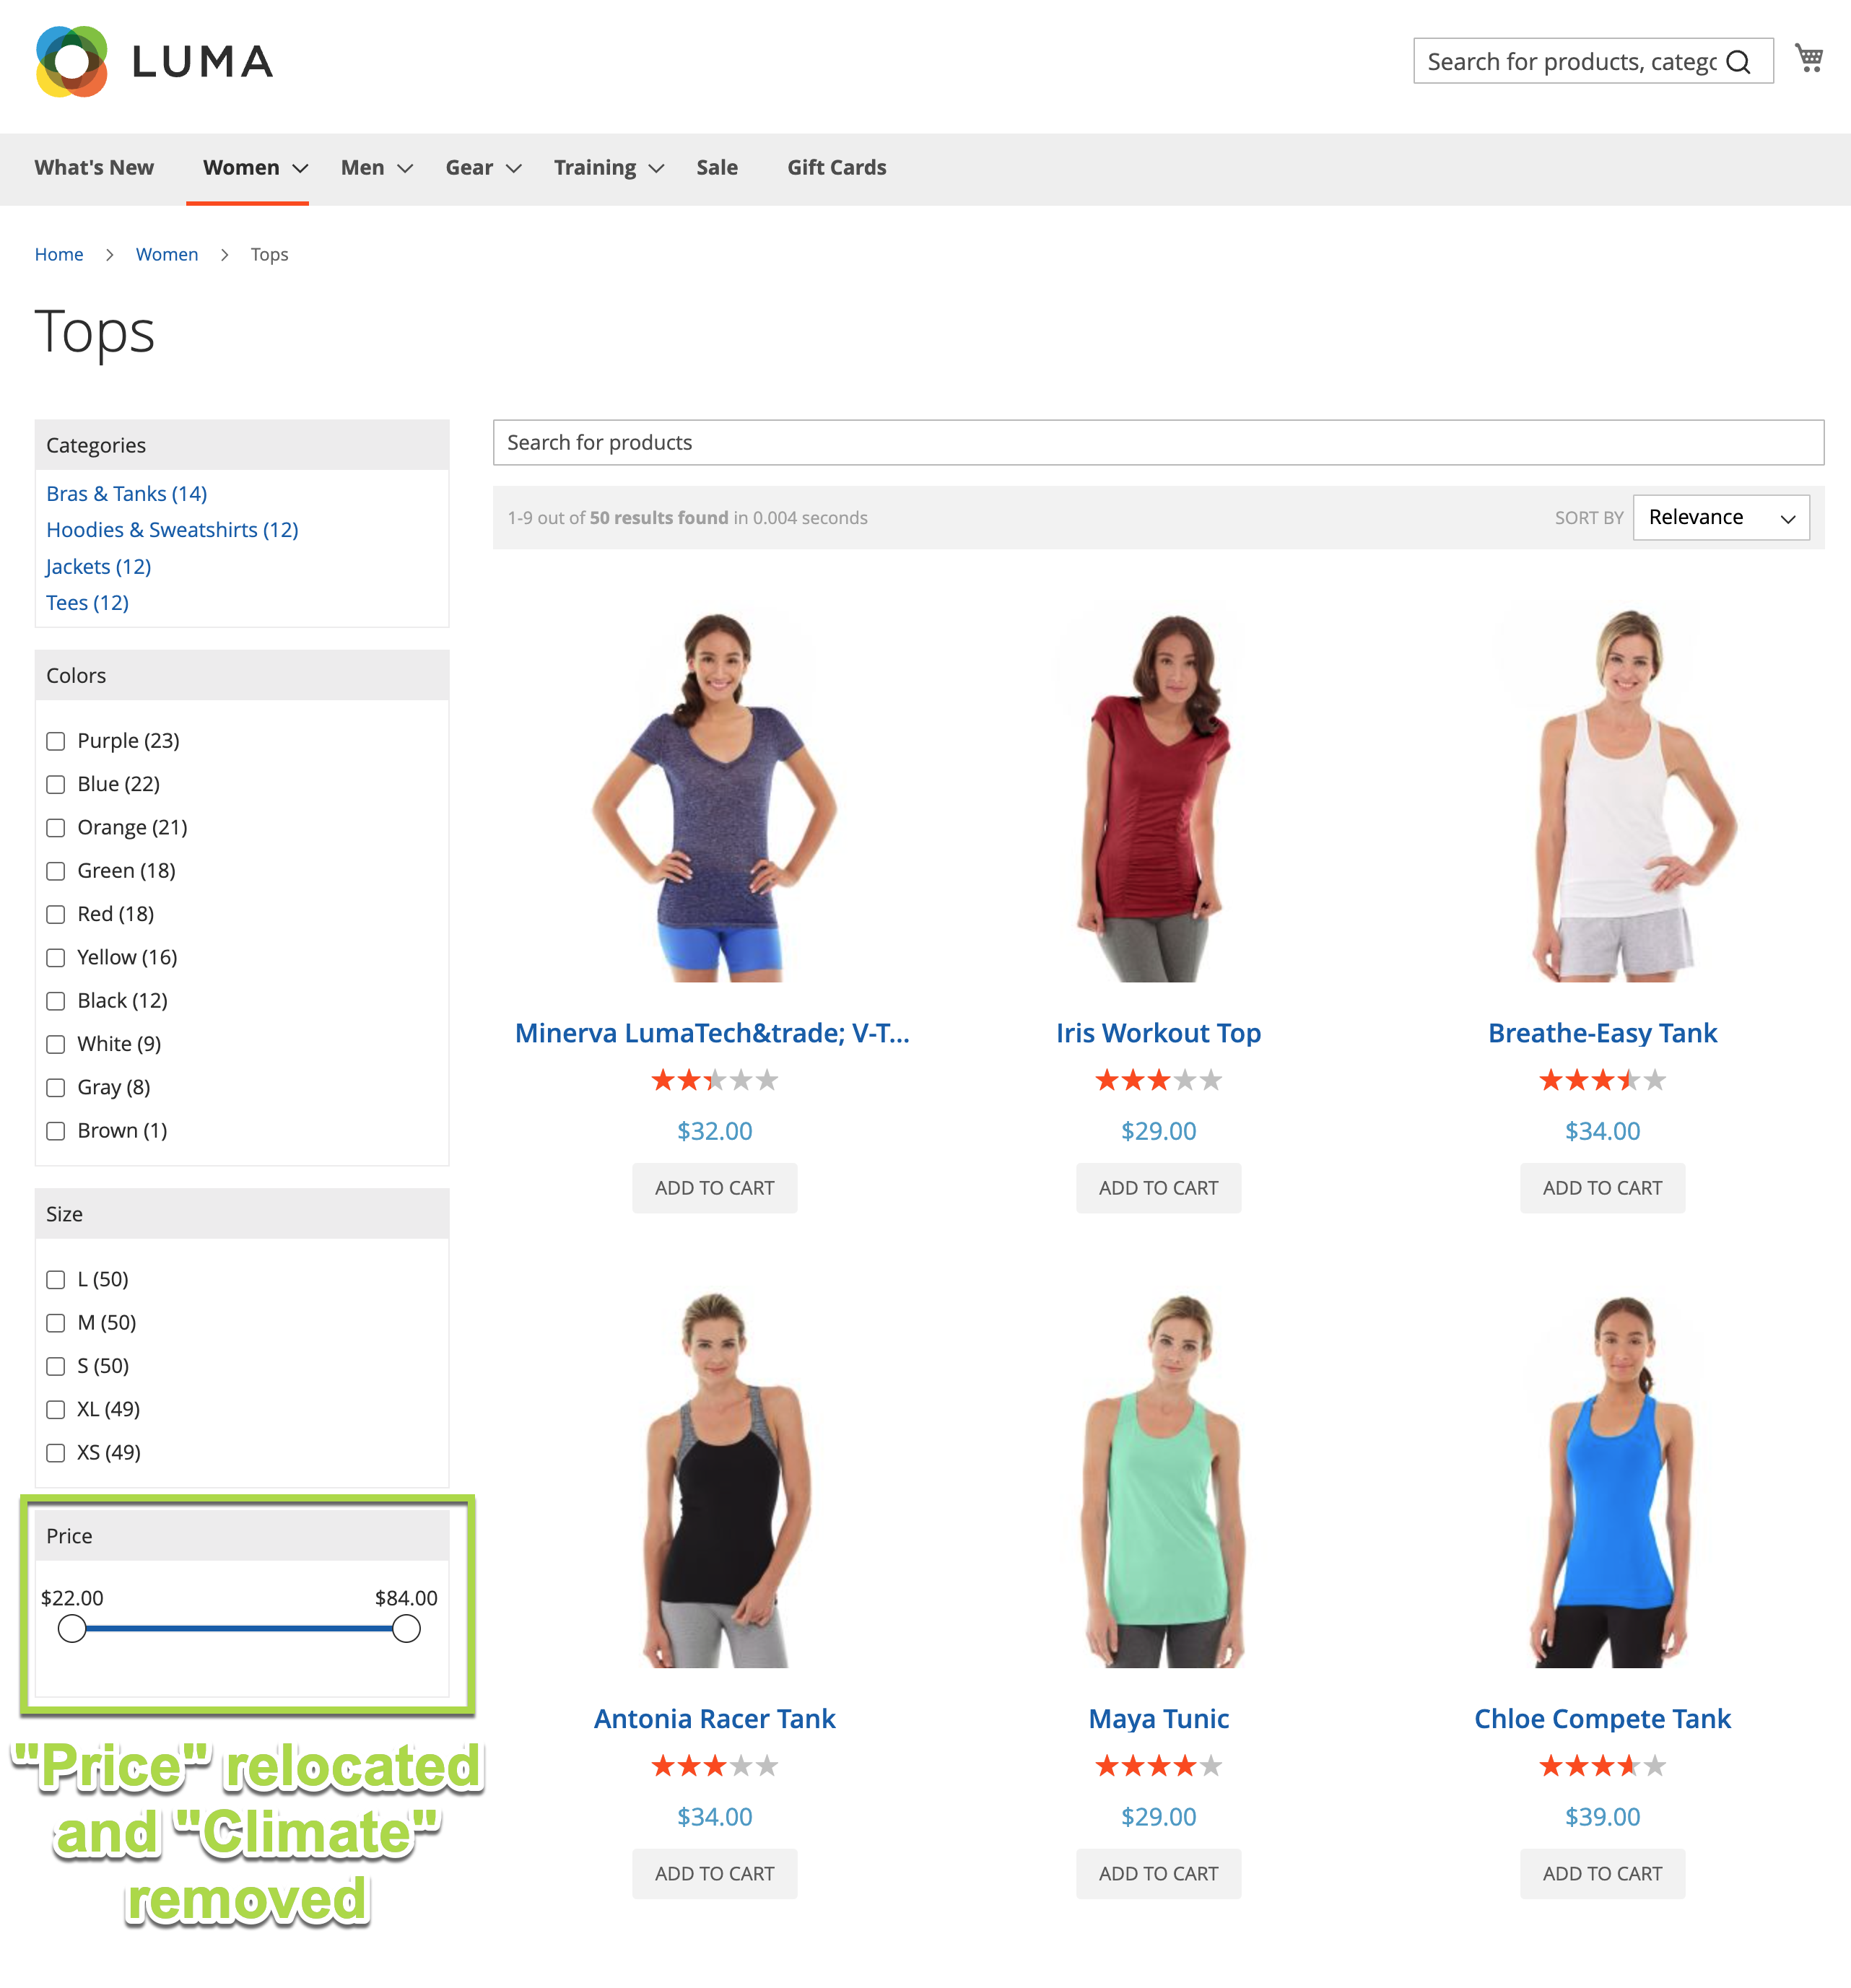
In the following example, a category page features the five facets that were applied earlier but, for the Women > Tops category, “Climate” will be removed and “Price” moved to the bottom of the facet list.
To do this in Merchandising Studio, go to Merchandising Studio > Visual Merchandiser, select “Category page”, search for the category “Women Tops” and then select Curate this page:

To use Magento categories with Merchandising Studio, enable them from Magento admin.
Next, select Order facets where you can define the exact facets you want to display:

Configuring facet display
Because the Facet Display feature only works with scalar values (single, distinct values), it can’t directly process Magento attributes like categories and prices, which are objects.
When adding these attributes to your dynamic faceting rule, reference them using nested attributes.
For example:
categoriesmaps tocategories.level0pricemaps toprice.USD.default
Prices may vary by factors such as the user’s locale and customer group so be sure to list all possible price attributes in your faceting rule. Review the relevant objects in your Algolia product index to understand how the Magento extension serializes this data.
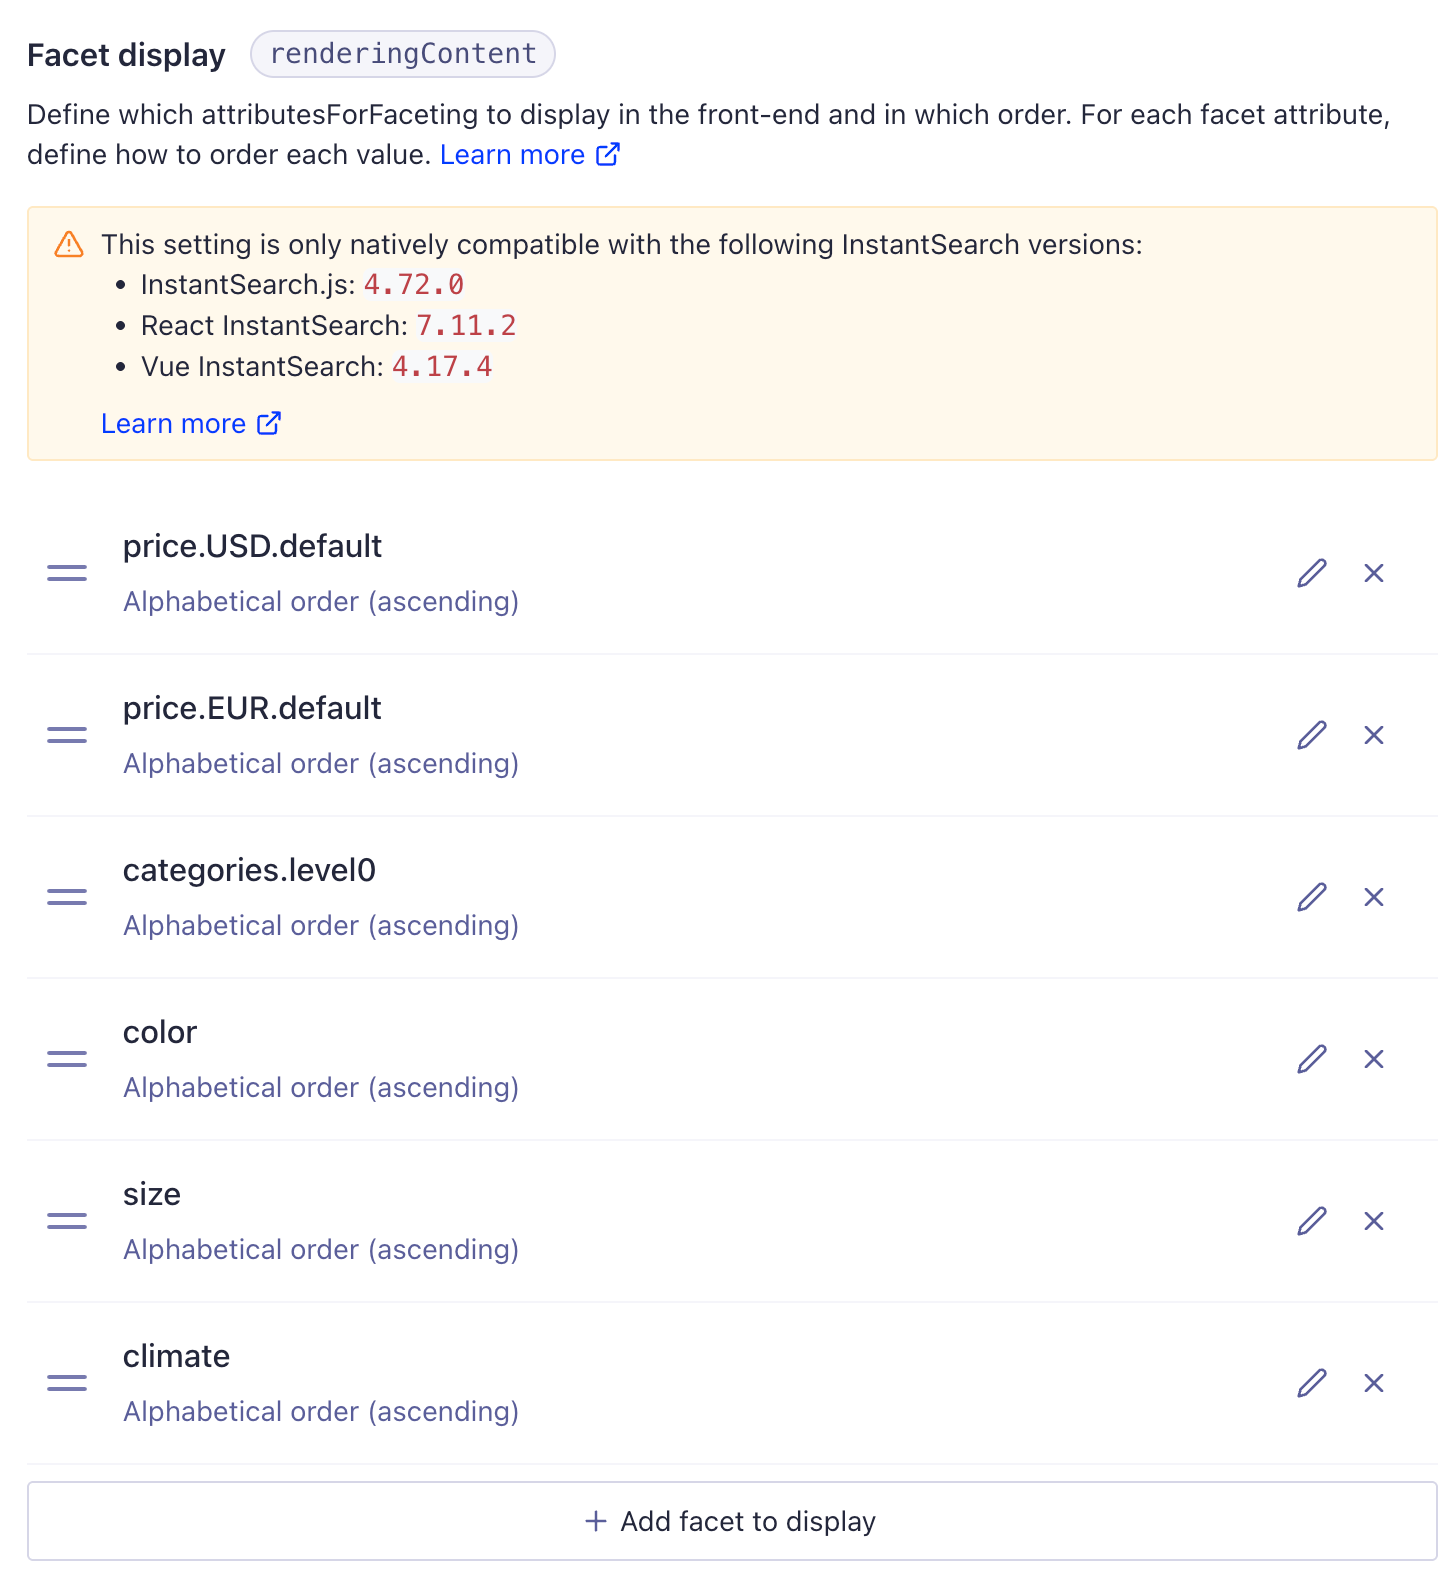
Add the following dynamic facets to the preceding example:
After saving this rule in Algolia, on the Magento store front, the rules are immediately applied:
Redirects
From Magento extension version 3.16, you can use Algolia rules to redirect users to a specific page of your website based on a user’s search query or other filtering conditions.
Redirect features work with the Autocomplete and InstantSearch UI libraries that ship with the extension. Redirect is enabled by default for Autocomplete but turned off for InstantSearch.
Using redirects with Autocomplete
To use redirects with Autocomplete, enable the feature in the Magento extension at Stores > Configuration > Algolia Search > Autocomplete Menu > Redirects > Enable redirects:
When the feature is enabled, it functions in one of three modes:
-
Do not display the redirect (handle on form submit only).
-
Display the redirect as a selectable item in place of search hits.
-
Display both search hits and a selectable redirect.

You can choose for the selectable link to open in a new window but form submissions must target the current window.
Using redirects with InstantSearch
To use redirects with InstantSearch, enable the feature in the Magento extension at Stores > Configuration > Algolia Search > InstantSearch Results Page > Redirects > Enable redirects:
The InstantSearch redirect feature has four options:
- Redirect on page load. If InstantSearch loads search results that include a redirect, immediately take the user to that URL.
- Trigger redirect on “search as you type”. As the user types their query in the
searchBoxwidget, matching hits will be retrieved automatically from Algolia. If a redirect exists for the search query, this setting will send the user to that URL.- Display redirect as a selectable item:
If a redirect is found for a search query, display a clickable link to that URL above the search result hits.
- Display redirect as a selectable item:
If a redirect is found for a search query, display a clickable link to that URL above the search result hits.
- Open redirect URL in a new window. This setting only applies to links.
Migration of manual rules
The legacy merchandiser provided by the Magento extension creates manual rules whereas the Merchandising Studio creates visual rules. While both types of rules can coexist, older rules take precedence over newer rules.
You can’t automatically migrate older, manual rules created by the Magento extension. If you want to switch to the Merchandising Studio, you need to delete and recreate the rules in the Algolia dashboard.
You can automate this process by using the Rules API methods, or the Algolia CLI.
